Placeholder objects
Placeholder objects in EPLAN, represented by the anchor symbol, are special reference objects used to enable value sets and variants by defining which properties of devices or functions can change between different configurations.
They do not represent technical components themselves, but act as control objects that manage variable property values within a project, page, or macro.
The anchor placeholder object is used to:
Define variant-dependent properties
Control which values are switched by value sets
Apply different configurations to the same schematic
Enable modular and configurable designs
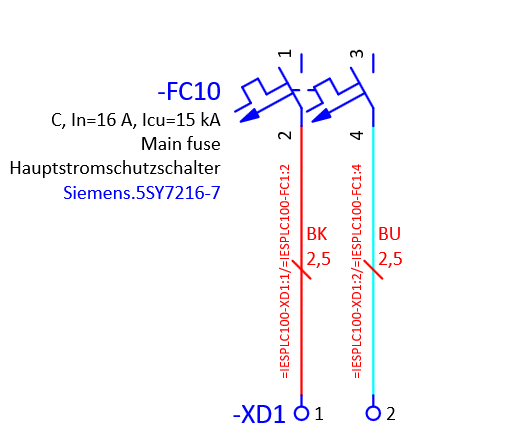
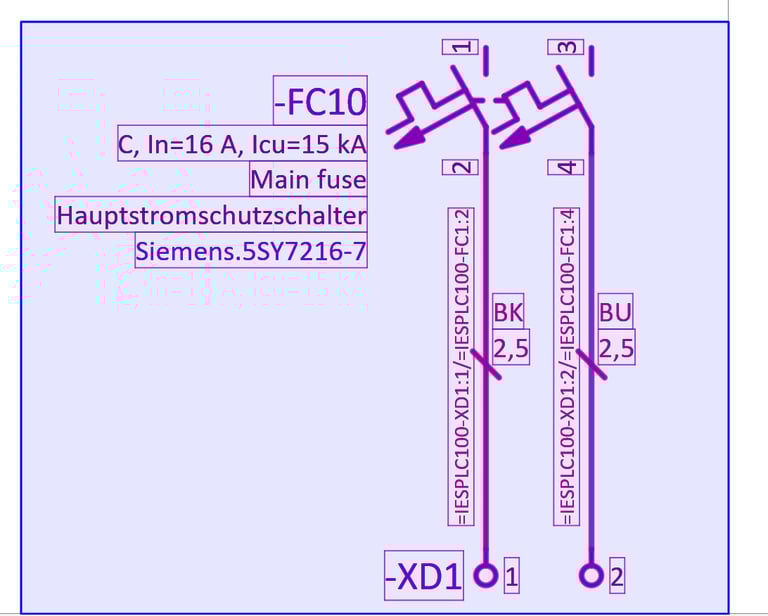
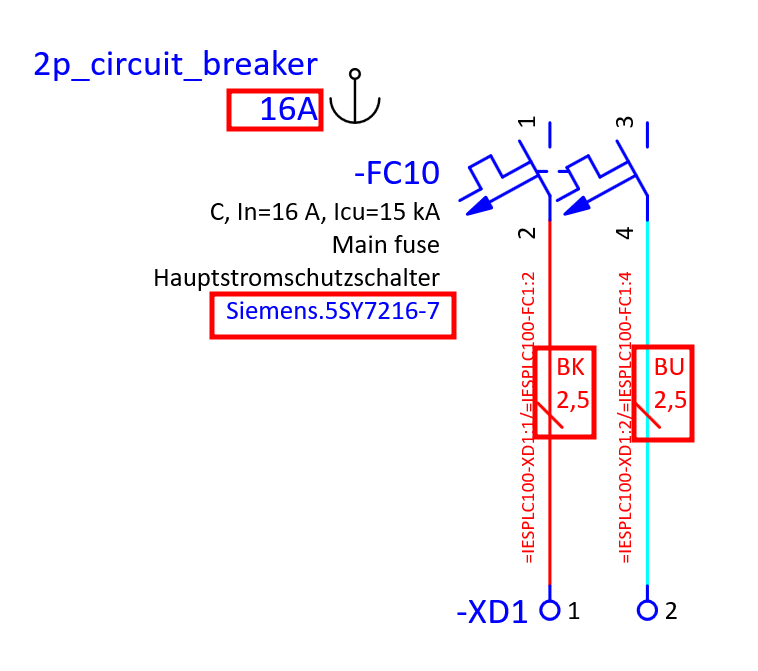
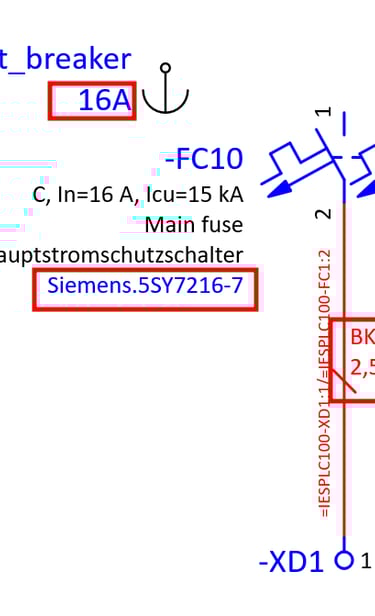
In this example we have a 2 pole circuit breaker which is connected with 2 wires 2,5 mm² cross-section to the terminals. We will use this example to demonstrate the functionality of placeholder objects. We will create 2 value sets within the placeholder object one for 10A rated current and another for 20A rated current. With these 2 value sets we will change the 2 pole circuit breaker part numbers according to the rated current and we will also change the wire cross-section.


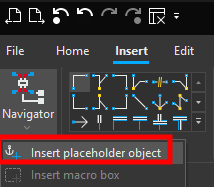
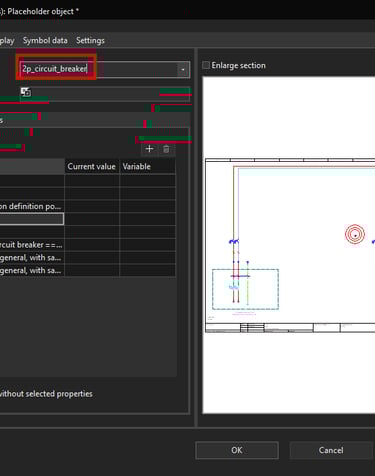
To insert a placeholder object click on the Insert ribbon and then click on the small arrow under the macro navigator and then click on Insert placeholder object.

Now we have to place the placeholder object on the work surface and make sure to insert all of the elements that we wish to change in the placeholder object. We will left click on the work surface next to the circuit breaker and then we will drag the mouse button up to the point where all of the elements which will be inserted are highlighted.
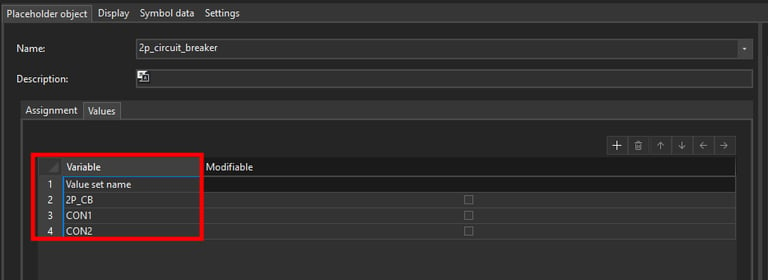
Now click the left mouse button again to finish placing the placeholder object. We can give the placeholder object a name in this case 2p_circuit_breaker.
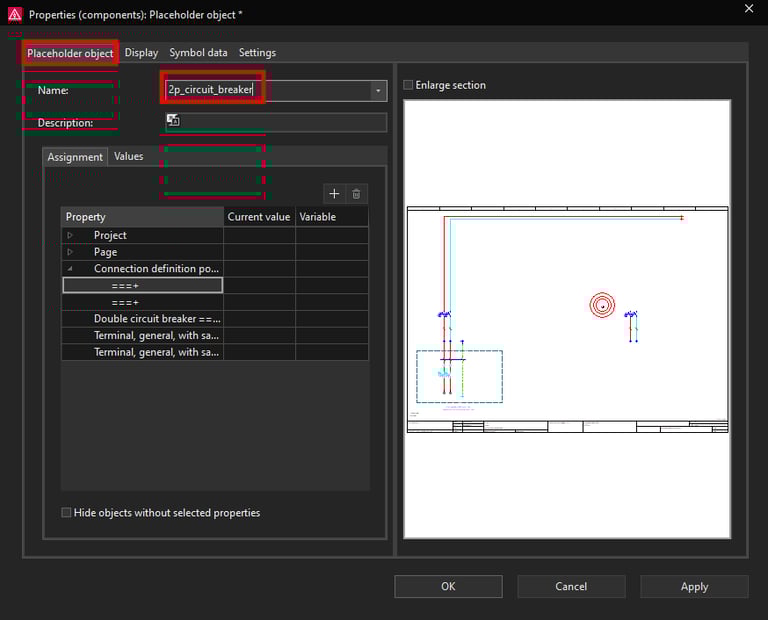
On the left side you can see all of the properties that you can use to assign variables to.
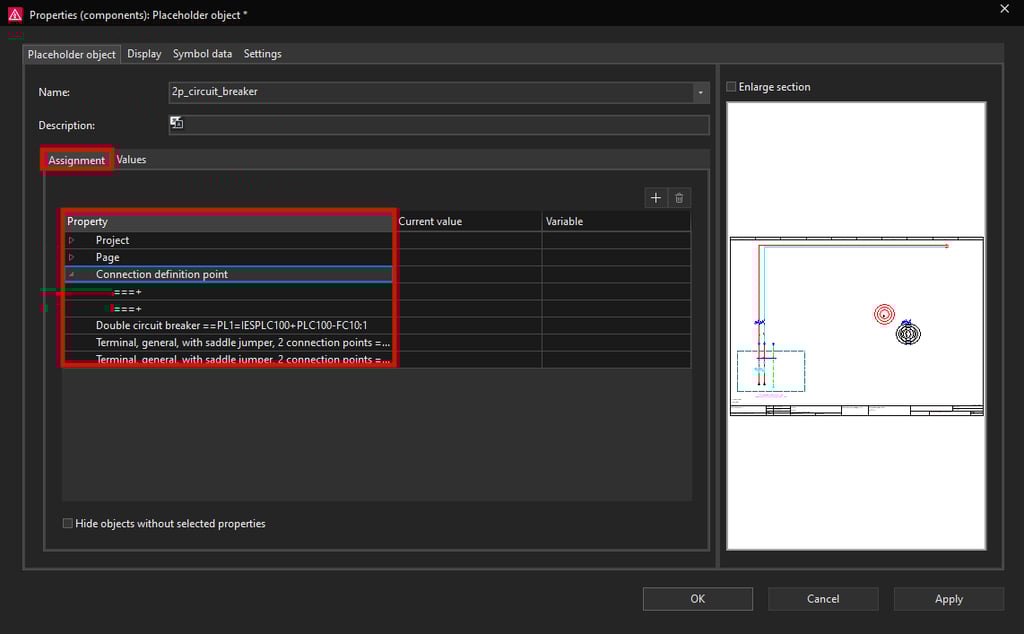
Now we will assign a variable on the Double circuit breaker symbol to be able to change the part number according to the rated current. Select the Double circuit breaker ==PL1=IESPLC100+PLC100-FC10:1 property and then click on the plus icon at the top right.
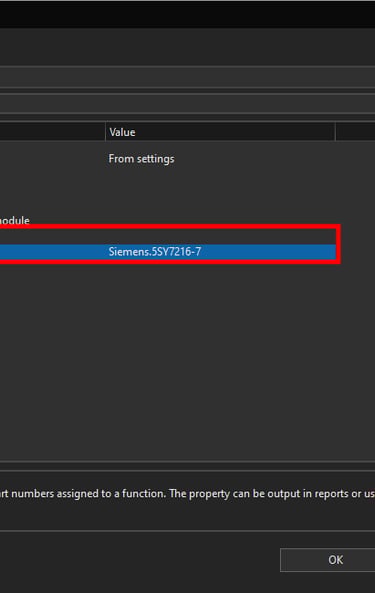
Now we will select the Part number [1] property, you can see the current value for this property is currently set to Siemens.5SY7216-7 which is the current part number of the circuit breaker.
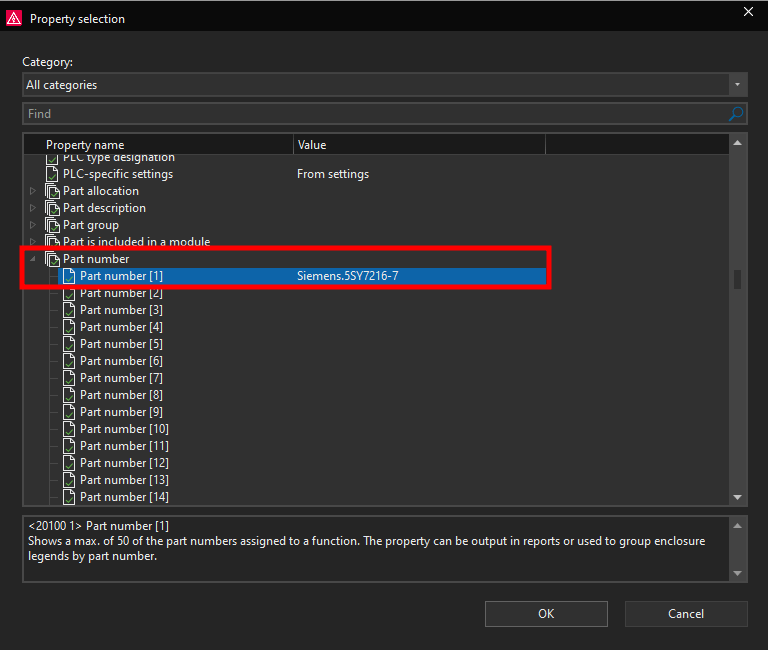
Then click on the OK button. Now we can create the variable which will be used to change this property. We will write 2P_CB in the Variable field.
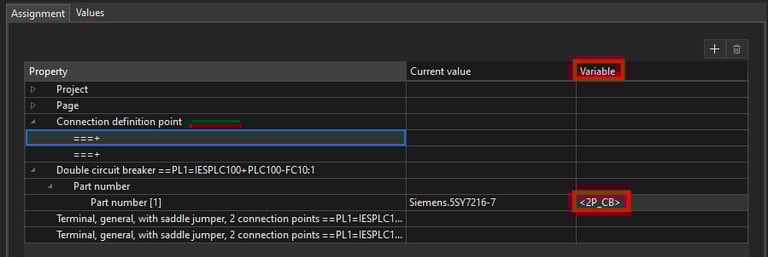

In the same way we will add the connection cross-section variables in the Connection definition point property. We will name the variables CON1 and CON2.
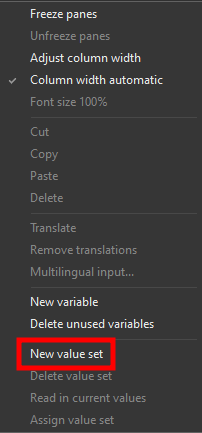
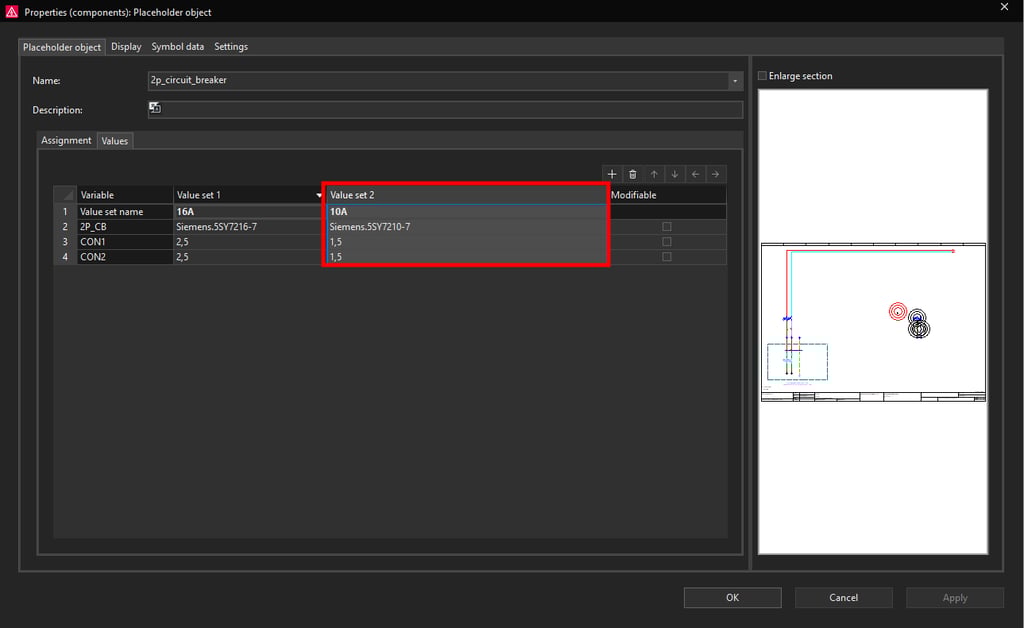
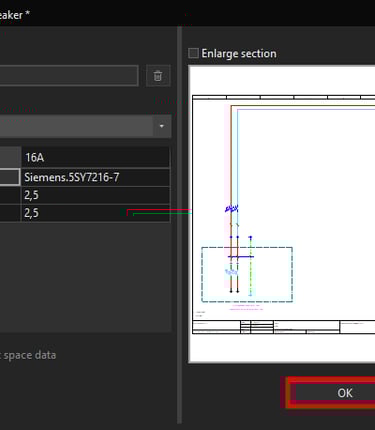
By right clicking on the empty space we can add a new value set by clicking on the New value set command.

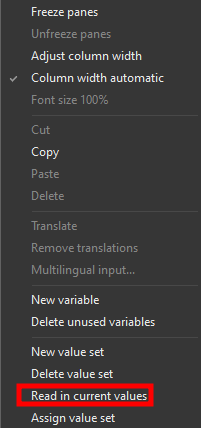
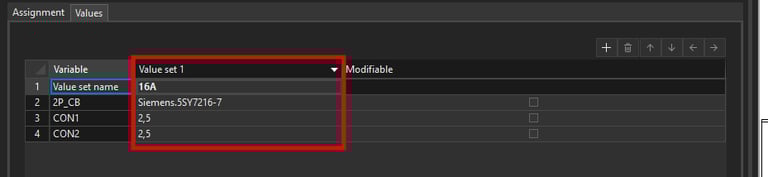
We can give the new value set a name in this case 16A according to the rated current. For this value set we want to take the existing values from the circuit diagram. We can do this by right clicking on the 16A value set and then clicking on the Read in current values command.

Notice how all of the current values which are present on the circuit diagram were assigned to the 16A value set.
In the same way we will create another value set for 10A rated current. Since this value set will be used for 10A rated current we will assign the Siemens circuit breaker part number which has the rated current 10A. Also for the wire cross section we will write in 1,5 mm² cross-section. When you are finished with setting up the placeholder values click on the OK button.
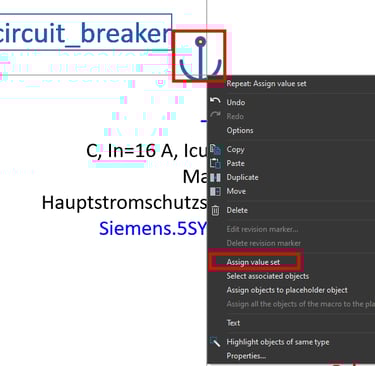
Now we can test the placeholder object by right clicking on the placeholder object anchor symbol and then clicking on the Assign value set command.

Now the Select value set window will open, here we can select one of the value sets that we created in this case we can choose between 10A and 16A value sets.
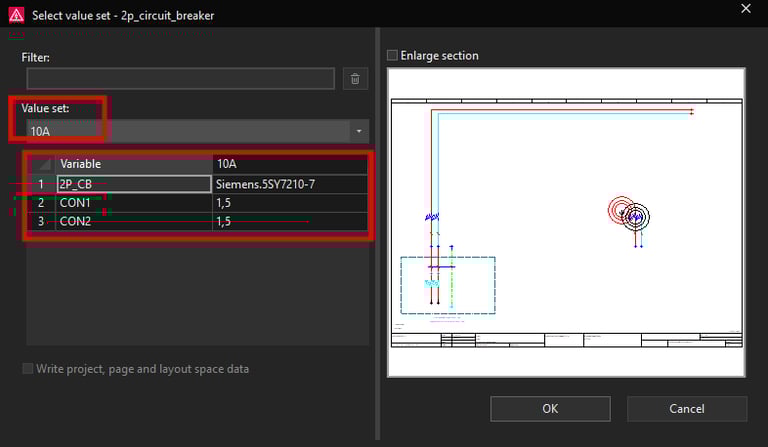
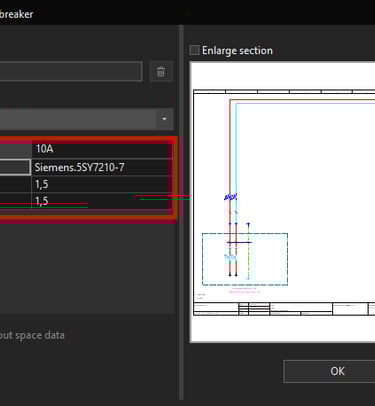
Now we will select the 10A value set and click on the OK button.
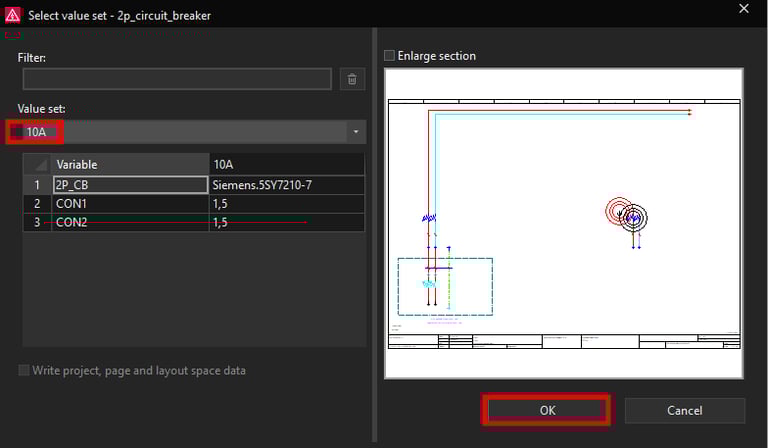

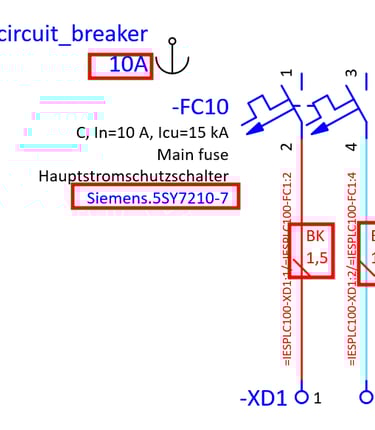
If the placeholder object was configured correctly the part number of the circuit breaker should change and also the wire cross-section should change from 2,5 mm² cross-section to 1,5 mm² cross-section.

We can see that the 10A value set is functioning correctly, now we can test the 16A value set by selecting the 16A value set.
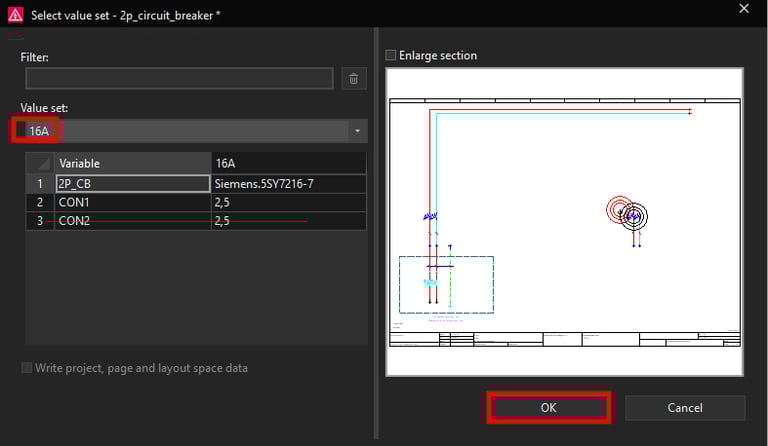
The values should now change back to 16A circuit breaker and also the wire cross-section should change back to 2,5 mm² cross-section.
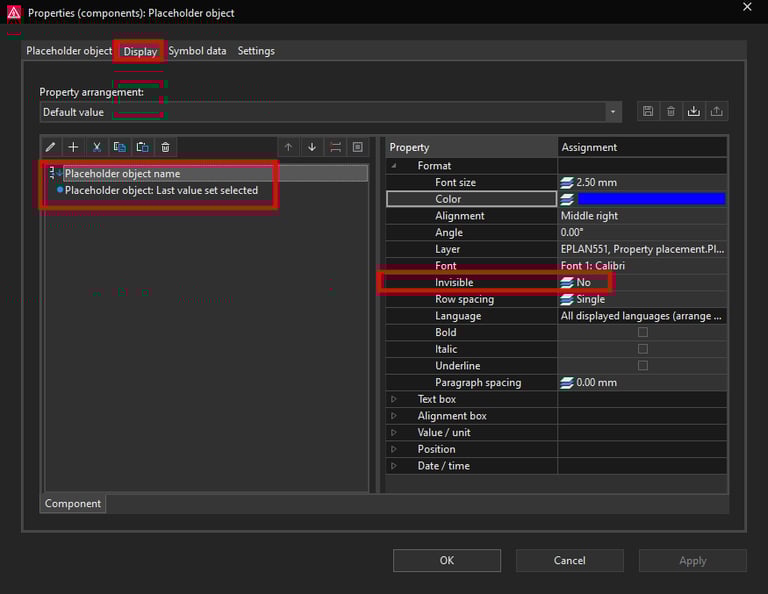
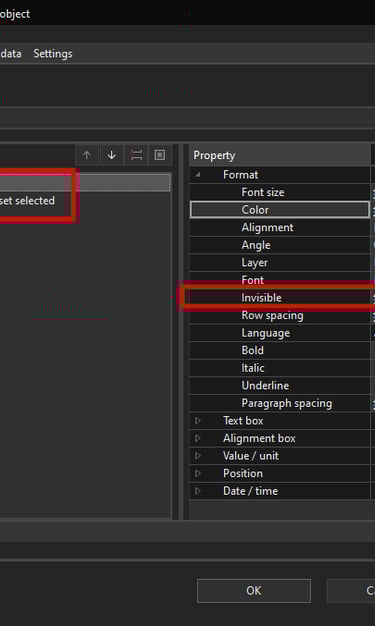
You can also change the visibility of the placeholder object properties such as name and description in the Display tab.